By Bill Prueter - 8/29/2008
Imaging delights some. Others are thrilled by catching live video moments. Both are legit, worthwhile and satisfying. Imaging cameras have remarkable ability to record colors and shading. What tool has sensitivity for millions of shades of intensity, colors and can negate temporary fluctuations in atmospheric disturbances? That tool is the human eye, an
organ which produces proteins at light speed to keep receiving photons of light in endless streams. The eye needs a partner. That is the brain. This awesome organ can manipulate information, sift out nonsense and synthesize previous images with those which smack of accuracy. I make the case for live observations at the scope and putting those views on paper.
How to get started.
Sharpen a pencil, any pencil. Take a chair, place it in front of the scope, any scope. Preferably point it at the moon. You can start with any object. But the moon has so many features to examine that any telescope will give interesting views and plenty to draw. If it is still daylight, makes no difference. In fact drawing in the daylight eliminates the need to worry about lighting, flashlights etc. Sit down and get comfortable. If the moon is high in the sky, take out a stool, maybe your child’s bathroom stool. Sitting is much more comfortable than standing. Use a diagonal, it is much more comfortable. You do not need an equatorial mount. Sit down, point the scope. Make enough magnification to allow a prominent sea or crater to display some features.
If you are going out at night, kind of dark, isn’t it? Take a flash light with you. Get a flashlight with a clip on it. Clip it to the hood of your sweatshirt, on the side near your ear. I found my flash light at http://www.zengineering.cjb.net/. They come with red or white bulbs. White light is great for the Moon. If it is warm, wear a thin hood. You can, if you wish, go to the web and read other methods for lighting, but they are going to add equipment and trips back to the house and more expense. Some seem to me very labor intensive. Check my photo, it may give you an idea, even a better one.

What paper should be used?
In the beginning - any paper. Take something along to support the paper. After a while, get a note book. I really like Sketchbook by Fusion. The paper is very heavy (100 lbs. weight). It easily resists dew and dampness. It also endures numerous erasures. It also has a nice smooth surface which will allow for nice details. One side is lined, the facing page is blank. I put my information on the lined side. What I have observed, how long, filters used, magnification, date etc. Some papers are bumpy and do not allow accurate drawings.
Begin to draw what you see. Take some time to look at the object. Select some feature which attracts your attention. Let us say, it is the crater, Plato. What is the shape? Are there any mountains near by? Is the floor of the crater smooth, rough? What do you notice about the rim which goes around the crater? Are there breaks in the walls? Continuous ridges? Can you see any craters in the crater? Dark spots, light spots? Pick out some features. Draw them. Use your pencil to show areas which are darker or lighter. You may want to make notes. Be sure to record the time and date. The notes may take on a simple description. Such as: darker here, lighter there, really dark, in between. Use this drawing as a guide to make a final drawing of what you see, once you go inside. Worry more about drawing size and proportions accurately rather than making it look good.
Keep your expectations low. Your drawing may not look like much. But cherish it, and make sure you keep it.
Here are two of my earliest drawings:

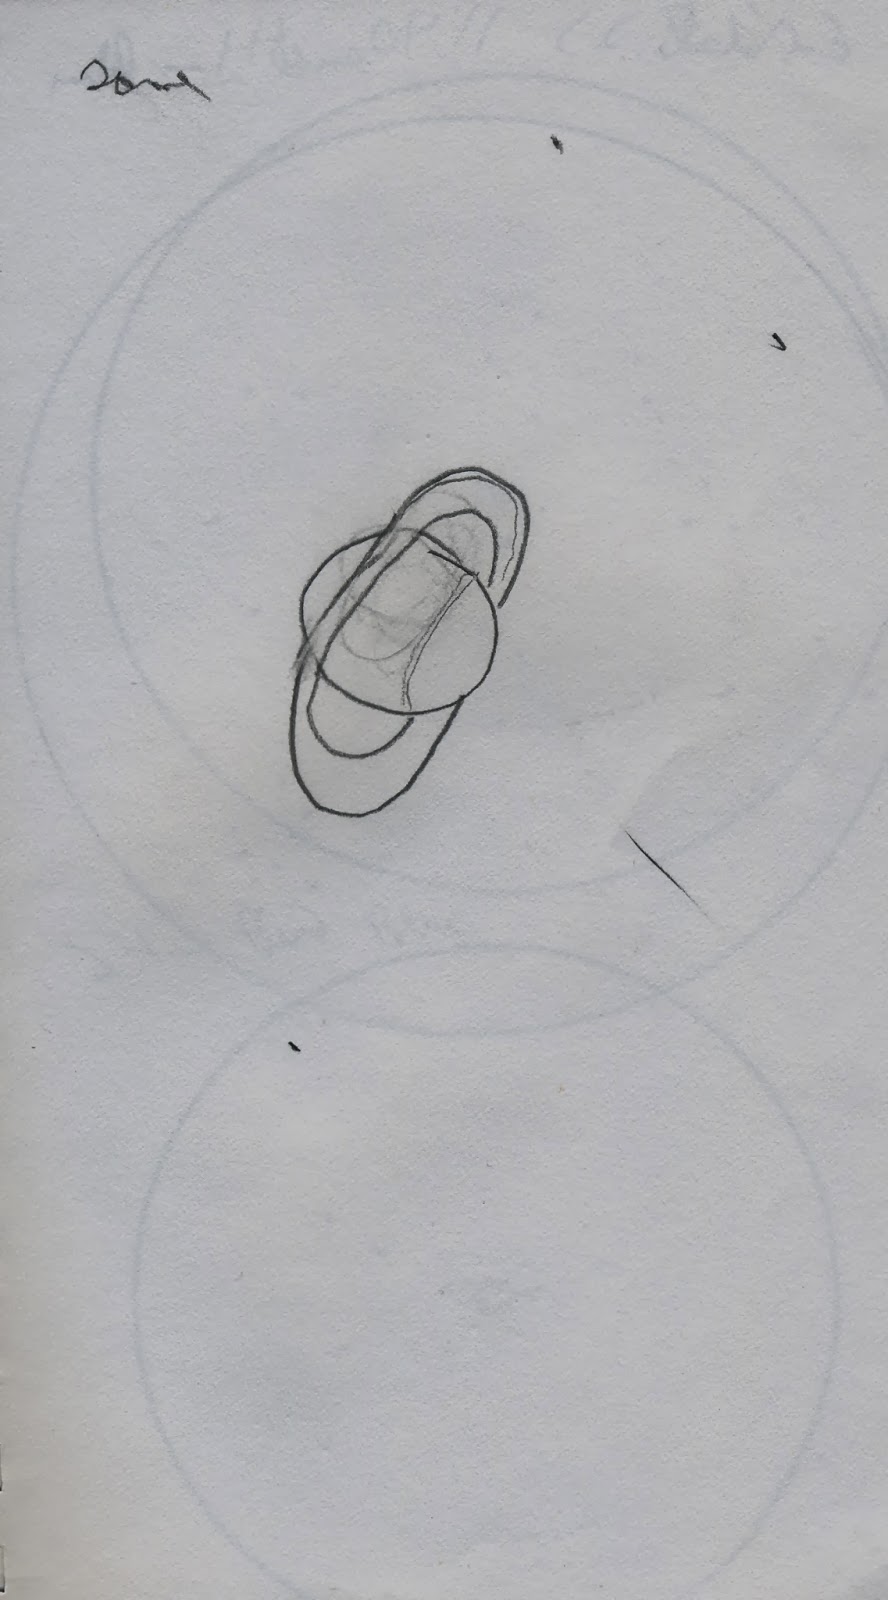
Note how simple it looks. In fact childlike. Some might be tempted to bury such efforts. Big mistake. Keep drawing and once and a while go back, look at the early stuff and then begin to realize the advances you have made. Can’t do that if you chuck what does not measure up to your hopes. There are a number of reasons these drawings do not look like much:
1. I needed to develop my drawing skills. Practice will take care of that.
2. I needed to learn to look for details. This requires training. That means looking frequently through the telescope. I have sometimes noticed that my drawings rival in detail what telescopes reveal using digital imaging.
3. I also needed to learn to connect what my mind saw with care in drawing.
4. I also needed to learn to be more patient. That is one more reason to have a comfortable position to observe.
Books.
I am not a big fan of astronomy books which discuss how to draw. I have purchased some. They may be what you need or want. Buy them. For me some have too much of an artsy approach. Sure, it sounds good but when I am done with a sentence, I wonder just exactly what good lies therein and what it means. Association of Lunar and Planetary Observers (ALPO) highly recommends a book entitled: Introduction to Observing and Photographing the Solar System by Dobbins, Parker, Capen. This book is out of print but used copies are available. It tells you what to look for in Solar System objects (planets, sun, moon, comets, asteroids). It also explains how our atmosphere works. This has turned out to be a very big plus. As a result I learned about weather. Clouds are not necessarily the enemy. There are even times where the leading edge of a cloud brings great stability to quality view. I also learned that the moon has great wonders to offer, mysteries and joy. If someone had said when I received the book that this is the interpretation of the atmosphere and approach it would give to observing, I would have been incredulous. Just another example in my life of the endless set of connections between one so-called disparate subject and another. It also discusses what to look for on Mars, Jupiter, Saturn etc. The chapters on photography are dated but that is not the reason I purchased it.
ALPO also provides a manual for learning to draw. Its instructions show you how to make what they call intensity drawings. Numbers are used on a scale of one to ten. One is complete darkness, ten is brightest. These are called intensity numbers. The others are shades in between. These numbers are placed in those areas of your drawing which will indicate how dark that area will be drawn in your final drawing. To do this will be handy to buy drawing pencils which have different hardness. Different shades are possible with different number of pencil. I recommend buying at an art store 6B, H and 6H. You may also want an eraser. I suggest Papermate’s Tuff Stuff Eraser Stick. It works well and allows fine line erasing. This book has some weaknesses which are partially mitigated by its briefness.
Look at an example of an intensity drawing I have made. The first is an early one; the second is more recent.

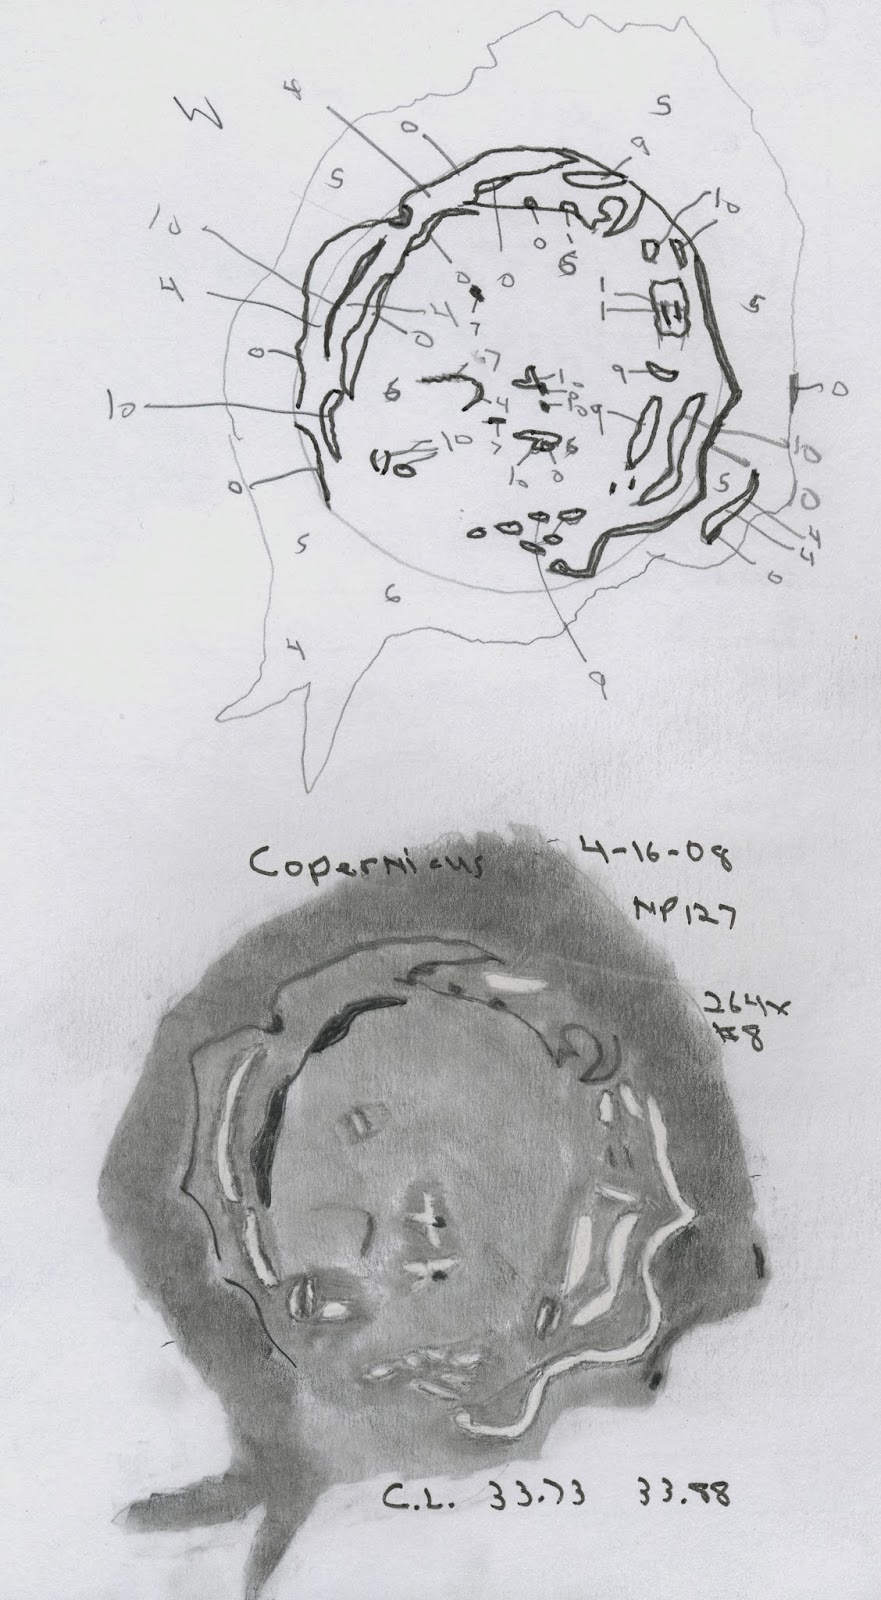
There are several factors involved in intensity drawings. I think that the following two are the most important: learning to gauge which area is the lightest, which the darkest and those shades in between the two. The best cure for poor drawings is to practice. The other is looking with care for details. It is often the case for me that I notice something after I have already been looking at the object for 10, 15, 20 minutes. I look around, then, the next view something seems to pop out that simply eluded me before. It could be that the atmosphere cooperated and gave me great clarity for a moment or two or I simply missed the feature.
Part of the beauty, in my humble judgement, is that you do not need to be out there all night. There are those who do that, fine. But for those who have trouble doing this, have jobs or can not fit such into their life, go out to make one drawing, if that is all of the time you have. You can make a nice rough draft with intensity numbers and features you have noticed in an hour or hour and a half. You still have an evening and actually will be refreshed for the next day, since this activity will sever those ties with what has been bugging you. It will, in the still of the night, energize and bring meaning to life.
If you need reasons to continue drawing, read Peltier’s Starlight Nights. Follow that up with The Friendly Stars by Martha Evans Martin. These will not even mention drawing but they will place stars and the universe in context of life and seasonal events. One of the many fascinating moments in Peltier’s book was when he mentioned how much he enjoyed hearing owls, birds, rustling critters during an evenings observation. There is more to this than just drawing, far more. The Friendly Stars was the book Peltier read when he was a kid which spurred him to study the sky in the first place. The woman who wrote it looked upon the stars as companions for flowers and plants as the seasons turned. Too much of astronomy seems to smack of memorizing lists and treating celestial objects as bugs under glass. Observing puts you with the bug. Read these books, if you wish, and maybe what you see will reflect worlds which bear a connection to life here on earth. This book is also out of print but used copies are available. Your local library, if you live in a state with a quality library system will be able to fetch a copy for free. Of course, you will need to return it when done.
Here are some later drawings:
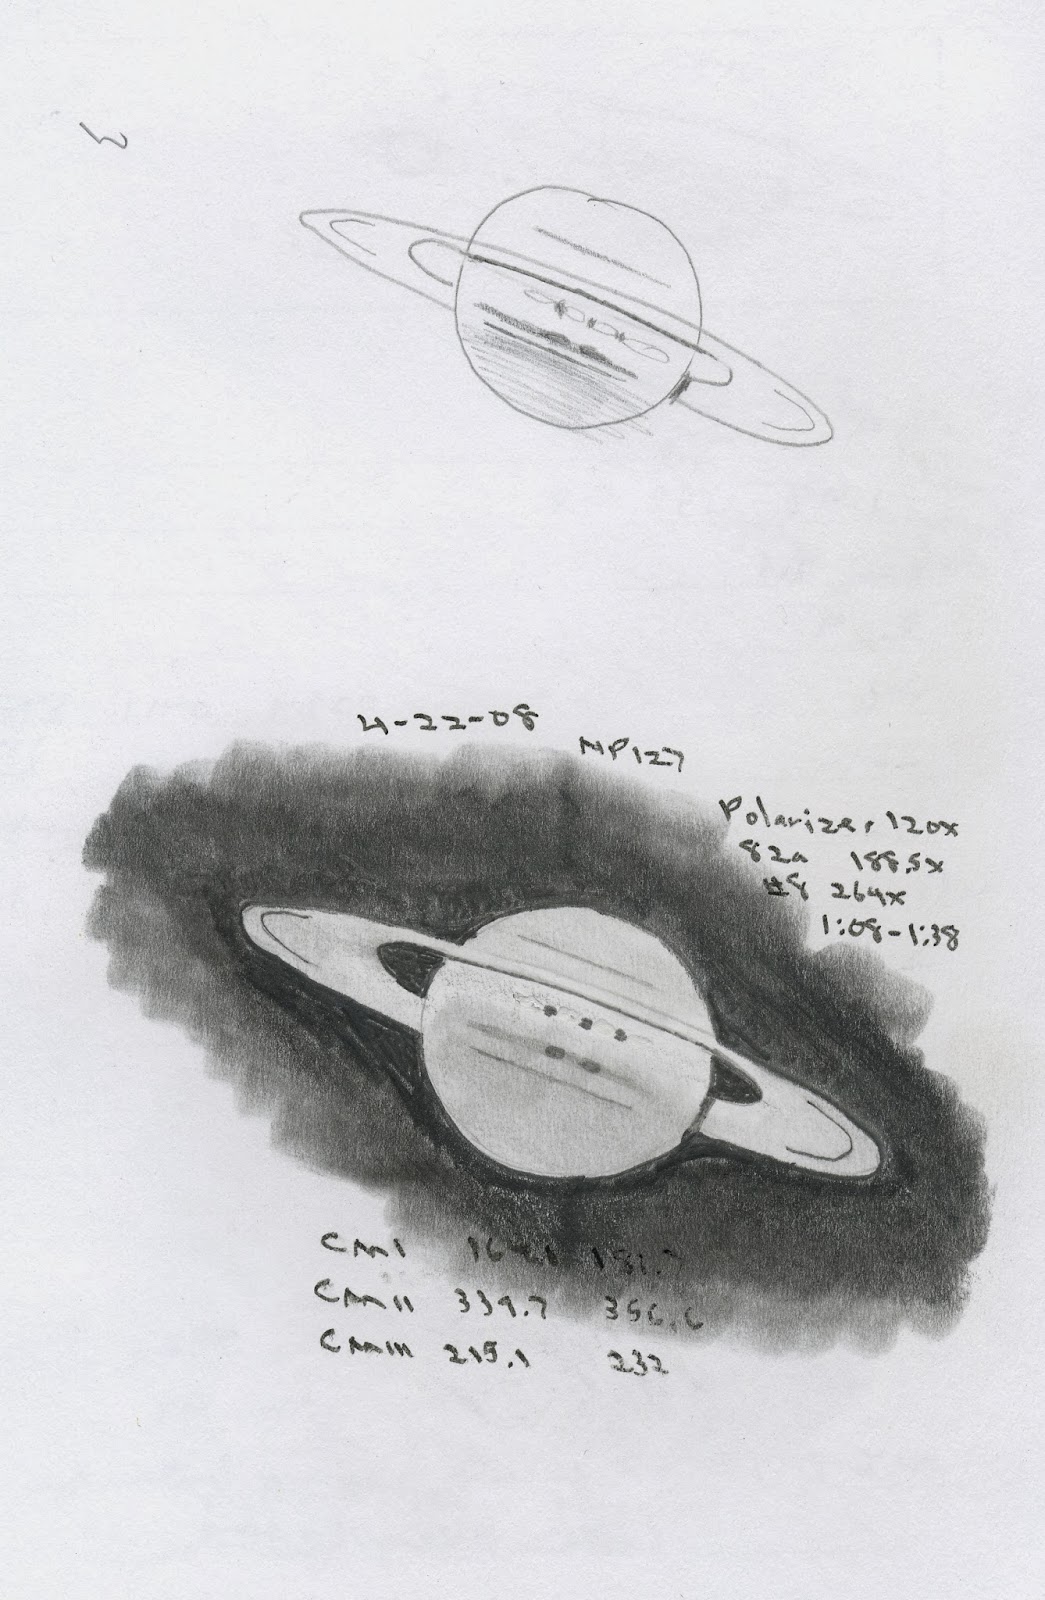

These drawings show more detail. Far more than the first ones. As you become more adept at drawing, you will want to include more information. How long did you observe while drawing? What was the temperature that night? This may help in planning proper clothing.
Averted vision.
What is this? The human eye and brain together are an awesome pair. The eye has a spot in the middle of our sight which is called the blind spot. In some ways our peripheral vision is stronger. Let us say that you are looking at Jupiter. Near by there are always three or four Galilean moons. Bend your eye to one of the moons, pick one furthest away. You will after time, notice features on the planet’s surface which you did not notice when looking directly at the planet. This takes practice. It takes time.
Clothing
There are some nice private websites which have wonderful information about how to dress for observing. Layered clothing is the best way to go. You will need to dress for temps about 20 degrees less than the actual ambient temp. So if the thermometer outside says 50 degrees, better dress as though it is 30 degrees. I have found that in the summer a light hooded sweatshirt is nice to wear- I clip my flashlight to it and it keeps mosquitos away.
Altazimuth mount versus Equatorial Mount.
Altazimuth mount is lighter, therefore it is easier to carry, for those of us who lug our scopes outside. It, of course, must be adjusted frequently in order to keep the object in view. I do not find this a bother. In fact I enjoy directly perceiving how quickly the world turns. Keeps one humble and fully aware that life should not be wasted. Equatorial mounts will track an object, once it is aligned. If you have a permanent place for your scope and you simply go out, roll off a roof and you are ready to go, then set up time is not a concern. But if you haul out the equatorial mount (probably will not be able to carry it with scope mounted on it- too heavy), attach scope, then it has to be aligned at least well enough to allow tracking ability to be useful. Be careful with adding on too much equipment. Studies show that scopes which are too much of a bother do not get used very often, in fact less and less until not at all. Keep it simple. At least as simple as you can.
What type of scope?
Whatever you have will do just great. If you are going to purchase one, then I would consider a refractor. These are much easier to sight. Lighter and yes more expensive per inch of aperture. However, more frequent use will be made of a Scope easy to carry and set up. There are 76 mm and 85 mm used scopes which are available for very good prices. The most important consideration: which scope is the most likely to be used most often? Refractors do not need alignment. They are good to go as is. Used ones are available.
This leads to eyepieces.
Select eyepieces with wide field of view. These are more expensive but will allow a larger area of view, even under higher magnification. Better to have very few good eyepieces rather than a sack full of poor ones. Wide angle is a nice feature for finding objects and keeping track of objects even with an altazimuth mount. By the way stick with a wooden mount, if you can, these do a much better job of damping vibrations. Main rule with eyepiece: select one or those which offer ease of use. The idea is not to collect a raft of eyepieces. Astromart has a nice offering, frequently for quality eyepieces.
Filters.
Filters are presented as necessities for observing. This is somewhat deceptive. Much, much, much can be seen with just you, the eyepiece and your telescope. For me filters have been a tricky item to grip. I feel at the moment that it is best to become as proficient as you can drawing with what you have and then when plateau has been reached, start with a filter. Best start for me was polarizer. Non variable type. I have used it with success on Jupiter, Mars, Venus and the Moon. I did not find it as much of a benefit on Saturn. Too little light, at least at high magnification. I have a five inch refractor. Thus I do not have a tremendous amount of light gathering ability. Also be careful reading suggested filters for particular objects put out by manufacturers. The reason for this is that a darker filter on my scope will not allow enough light to reach my eyes. This same darker filter may be perfect in a larger scope. I have for example a #8 yellow filter (very light yellow) which works very well with my scope on Saturn, Moon, Mars and Jupiter. My blue filter is also very light (82a). I suggest approaching filters with caution. No need to hurry into something. You can see a whole bunch with just the telescope, eyepiece and the mind’s eye.
Binoviewing
A binoviewer uses two eyepieces of the same focal length. This allows both eyes to be used. It reduces eye strain. It also eliminates the need to squeeze one eye shut which becomes very annoying after a while. Because you are using both eyes the brain helps to use the information which your eyes gather to make features more clear. The brain will also help to eliminate floaters, as one eye helps to compensate for another.
Binoviewers are expensive but combined with comfy chair, a position which makes it easy to look through the scope and wide angle eyepieces, the experience can only be enhanced. If the money scares, then look for used ones. That is what I have. Also better to use it with very few high quality eyepieces, rather than several which are to be honest not worth the money. As long as you have about 100 X, it is impressive what can be seen. Wide angle eyepieces also mean that you can use higher power, still find an object and keep it in view even with altazimuth mount. Check reviews for binoviewers. Some do not seem to be very good. Some are very heavy. This may be a consideration based on the kind and quality of scope you have. Astromart has binoviewers for sale. These are used, so be wary. Astromart does have a nice evaluation system.
Drawing on the spot is so very pleasant. I have heard coyotes, tree frogs, critters amongst the leaves. I have been suspended in the heavens, watched shadows grow on the Moon in a single evening and I have seen Jupiter’s moon clear his shadow and pop into view, in a matter of minutes. The silent hum of night, the pleasant rustle of leaves, the beauty above breaks the distance and brings the heavens to walk with me. Grasping great distances is fruitless and oppressive. The key to grasping the universe lies in making a connection between the beauty of daylight, the passing of daytime color as night embraces and the ever increasing intensity of color in night time sky. The beauty of day fades into the glory of nocturnal color.
"A feeling of awe for the stars is not induced by exciting wonder at the expanse and mystery of the heavens, nor by burdening and oppressing the mind with the vastness that seems beyond all compassing thought, but by showing how the stars like flowers and trees are but parts of the visible beauty of nature which have their share in making "the perfect whole". (Martin, The Friendly Stars)
This and a whole lot more beckons.
No comments:
Post a Comment